Setting | Description |
|---|
Search for a user | Enter the name of a user to filter the Attendees list. |
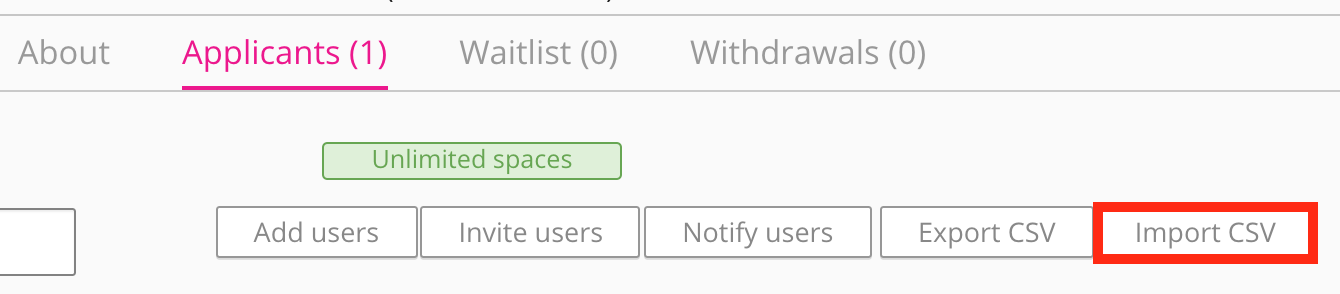
Add users | To add users to attend the occurrence: Click Add users.
The Add users screen appears. In the Add user(s) name here field, enter the name of one or more users. If the number of users exceeds the number of spaces available for the occurrence, the space capacity automatically increases. Click Add.
The users are added to the Attendees list and receive a notification.
|
Invite users | To share the occurrence with specific users: Click Invite users.
The Invite users screen appears. In the Add user(s) name here field, enter the name of one or more users. If necessary, in the Write message here field, enter a message to be sent to users with the event notification they will receive. Click Invite.
The users are sent invitation notifications. If they want to attend, the users must manually register.
|
Notify users | To send a notification to all users on the Attendees list: Click Notify users button.
The Notify users screen appears.
In the Insert subject here field, enter summary of the notification message. In the Write message here field, enter the notification message. Click Notify.
All users on the Attendees list are sent a notification, including users not approved to attend.
|
Export CSV | Click to export information about all users in the Attendees list to a CSV file. |
Import CSV | Click to import users to attend the occurrence using a CSV file.
 | Info |
|---|
Fuse does not support CSV files with UTF-8 encoding. You must save it as a standard CSV file. |
The CSV file must contain the following headers:
FuseID: The ID of the user being added to the event. E-mail: The email associated with the user's Fuse account. Username: The user's Fuse username. Attended?: Whether or not the user attended the event. Pass/Fail?:If the user passed or failed.
| Info |
|---|
A community admin can only import users into an event via CSV if:
|
| Info |
|---|
Community admins who are part of an admin group, cannot import users into an event, if the Events and Manage Events permissions are enabled on the Admin groups screen. |
|
Event creator / Manager sign off / Specified approver | If Sign off required is enabled on an occurrence, a column exists for each of the sign-off types enabled on the occurrence. | Info |
|---|
Sign off required is disabled by default and can be enabled under Applicant approval in the Advanced options section of the Creating a new event screen. |
To approve a registration: Click the tick button.
The tick button becomes green. Click Save.
The Events admin screen appears and the registration is approved.
To decline a registration: Click the cross button.
The Decline application screen appears. If necessary, let the user know why you are declining the registration.
The user receives a notification about the registration being declined.
|
Did the user attend? | After completion of the event, click one of the following buttons to mark user attendance: |
Training duration | If the user attended the event, use the Hours and Minutes dropdown lists to specify the amount of time contributed towards training for each attendee. |
Notify users | To send a notification to an individual user: Click the Notify users button for the user.
The Notify user screen appears. In the Insert subject here field, enter summary of the notification message. In the Write message here field, enter the notification message. Click Notify.
The user is sent a notification.
|
Remove user | To remove a user from the occurrence: Click the Remove user button for the user.
The Remove user screen appears. Click Confirm.
The user is removed from the occurrence.
|